Introduction
The Slide Copier is used in conjunction with the Auto Bellows to make same-size or enlarged copies of mounted 35 mm slides, or of single frames from strips or rolls of 35 mm film.
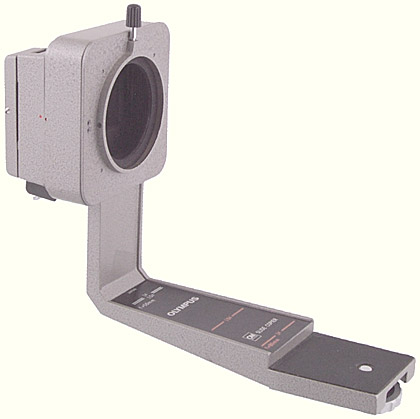
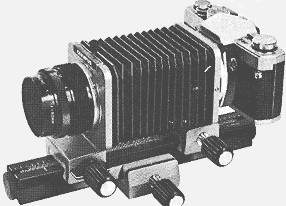
Olympus OM Slide Copier (first OM version)
The Copier includes a bellows lens hood to keep stray light from hitting the film or the lens. The built-in diffuser can be removed for use with a light source that has its own diffuser.
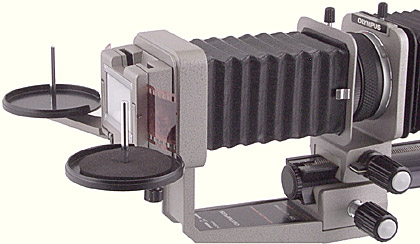
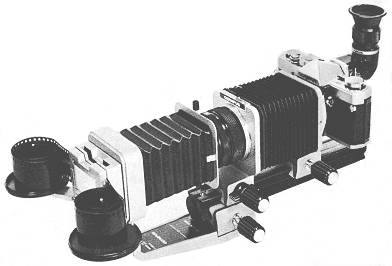
Olympus OM Slide Copier, with Roll Film Stage and Auto Bellows
The Copier is attached to the tripod focusing block of the Auto Bellows, and has its own ¼ inch tripod socket so that it can be attached to a tripod or a copy stand. It can be attached to the Macrophoto Stand VST-1, but the additional width of the Copier’s base prevents the optical axis from aligning with the centre of the stage plates.
| US stock no. | 104-111 |
|---|---|
| Introduced | 1972 |
| Discontinued | 2003 |
| 1978 US price | $74.00 |
| 1988 US price | $140.00 |
Versions
There are 3 versions. The first version was introduced in 1972 and has the “M SYSTEM” logo. It includes white 1× and 1.5× marks for 50 mm lenses and orange 1× and 1.5× marks for the manual Zuiko 1:1 Macro 80 mm f/4 lens.
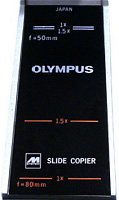
The M version of the Slide Copier
Photographs courtesy of Stephen Troy
The second version was introduced soon after the first, and the only difference is the normal “OM SYSTEM” logo. The later version, introduced in 1980, has additional green 1× and 1.5× marks for the Zuiko Auto-1:1 Macro 80 mm f/4 lens.
Accessories
The Roll Film Stage helps to keep a long roll of film (up to 10 m (33 1/3 feet) long) in place, and prevents it from unwinding.
Going digital
If you use a full-frame Canon digital SLR such as the 5D Mark II, then all you need to do is move the camera mount of the Auto Bellows closer to the lens mount, to allow for the extension tube that is needed to allow the release lever on the camera mount to clear the camera’s overhanging prism.
If you use an APS-C Canon digital SLR such as the 40D (with a 14 mm extension tube), then you can try the following settings for copying the full width of a 24×36 mm slide with the Zuiko Auto-1:1 Macro 80 mm f/4 lens:
- Front of bellows rail – align with white 1× mark for 50 mm lenses on the Slide Copier
- Lens – focusing helix fully retracted
- Lens mount – 136mm
- Camera mount – at far end of bellows rail
It is not possible to copy a whole 24×36 mm slide using a 50mm lens with an APS-C digital SLR because the magnification is too high, even with the minimum bellows extension.
If you use a camera with a four-thirds sensor, it is probably not possible to copy the whole of a 24×36 mm slide.
Instruction booklet
Reproduced with permission from the copyright owner, Olympus Optical Co., Ltd
Printed 0674 (June 1974)
INSTRUCTIONS FOR SLIDE COPIER
1. SLIDE COPIER
The slide copier unit is designed specifically for use with the Olympus OM System Auto Bellows for duplicating mounted slides and film strips. An extremely versatile accessory, this slide copier lets you make black and white or color negatives from color transparencies, or even make improvements on your original photograph. The roll film stage can be used in conjunction with the slide copier to facilitate duplication of roll film up to 10m (33 1/3 feet) in length.
2. DESCRIPTION OF CONTROLS

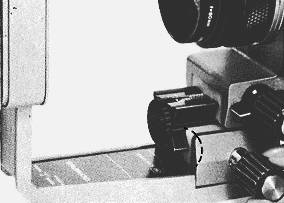
3. SETTING UP (1)
First mount the Auto Bellows to the camera following the instructions on page 25 and following pages in the instruction Manual for the Auto Bellows of the OM-System Macrophotography Group.
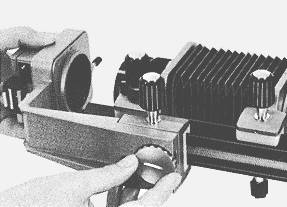
• To mount the slide copier to the auto bellows, first attach the slide copier’s supporting arm to the focusing tripod block on the bellows, with the block in contact with the stepped end of the magnification indicator board. Tighten the copier in place using the arm clamping screw.
• Mount the lens to the lens mount. Because it is specially designed for 1:1 (life size) magnification, the ZUIKO 1:1 Macro Lens 80mm F4 is recommended. You can also use the ZUIKO Macro 50mm F3.5, ZUIKO 50mm F1.8 or ZUIKO 50mm F1.4 Standard Lenses. If you want to duplicate only a particular portion of your slide, the ZUIKO Macro Lens 38mm F3.5 is recommended for best results.
4. SETTING UP (2)
• Align the base end of the lens mount board to the orange-white line on the magnification scale of the bellows and secure it in position with the lens clamping knob.
• The base end of camera body mount board must be aligned to the orange mark “1×” on the magnification scale of the bellows when the 80mm Macro Lens is used, or at the white mark “1×” or “1.5×” following your idea when the 50mm Macro Lens or 50mm Standard Lens is used and clamp.
• After loosening the focusing rail clamping knob on the auto bellows, rotate the focusing knob to align the end of the focusing rail to the “1×” or “1.5×” magnification line (orange for 80mm, white for 50mm lenses) on the magnification scale of the slide copier.
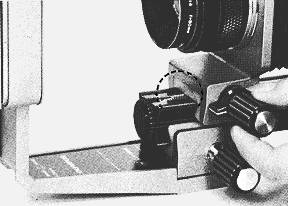
5. SETTING UP (3)

• To attach the lens hood mount to the lens, detach the bellows couplers and pull the bellows on the slide copier out until it reaches the lens hood. Secure the bellows to the lens using the lens hood clamping knob.
• Insert the mounted slide or film strip. To load a mounted slide, insert it into the slot near by the diffusion glass with the emulsion side (dull side) towards the camera. The slide should be seated all the way down. To load a film strip, pull down the film holder release lever to open the film holder. Then insert the film into the opening behind the diffusion glass. After correcting the film position (still pressing the holder top) push the button lock so that the film holder stays closed.
6. FOCUSING
 |
 |
To achieve correct focusing quickly and easily, first aim the camera towards any available light source. Loosening again the focusing rail clamping knob, rotate the focusing knob to focus on the subject while looking through the viewfinder. (Make sure that the focusing ring of the lens is set at infinity mark ∞). If the subject image is too small or too large to be photographed in the frame, adjust the magnification by rotating the camera shift knob on the camera body mount board. As magnification changes, the subject may be out of focus. If this happens, repeat focusing and camera body positioning procedures alternately until the correct focusing at the proper magnification has been achieved. The vertical position of the image can be adjusted by moving the film holder up or down. Normal positioning is obtained by aligning the red dots on the film holder and arm. To adjust the horizontal position of a film strip, push the button lock and pull the film to the right or left. The opening of the film holder can be adjusted by the adjusting knob. A clockwise turn makes the opening wider, and a counterclockwise turn makes it narrower.
7. EXPOSURE ADJUSTMENT
Exposure adjustment is just the same as the auto bellows. Please read the “Exposure Adjustment” at page 38 in the Instruction Manual for the Auto Bellows in the OM-System Macrophotography Group.
When a particular part of the subject is to be enlarged full in the duplication, use the Zuiko Macro 38mm F3.5. If the Zuiko Macro 50mm F3.5, Zuiko 50mm F1.8 or Zuiko 50mm F1.4 is available instead of the 38mm F3.5, reverse the lens.
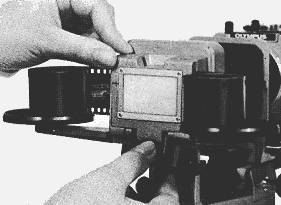
8. DIFFUSION GLASS
 |
 |
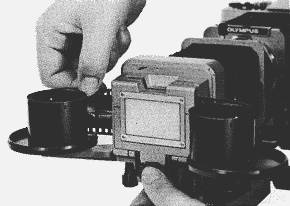
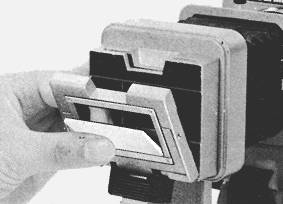
Removal of the Diffusion Glass
This diffusion glass will be removed from the film holder when the illuminator incorporates its own light diffusion device.
Open the film holder, and holding the diffusion glass between your thumb and index finger, slightly push it down and the glass can be removed (see left photo).
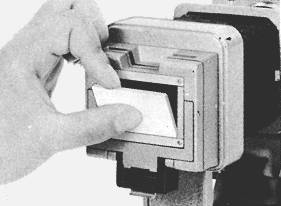
To re-mount the diffusion glass, reverse the procedure above (see right photo).
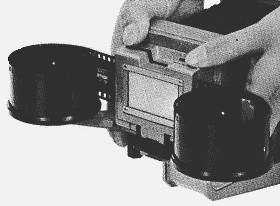
9. ROLL FILM STAGE
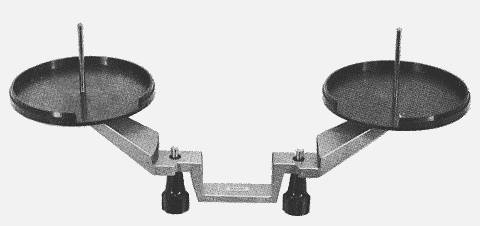
This stage is a convenient unit to be used with the slide copier for duplicating a roll film. A long roll, usually hard to handle, can easily be treated without a fear of giving scratches on the film surface.
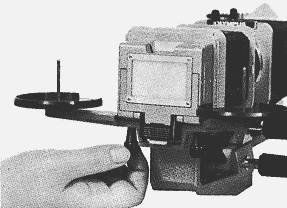
The roll film stage can be clamped under the film holder with two screws to conveniently duplicate roll films.
OLYMPUS
OLYMPUS OPTICAL CO., LTD.
43-2 Hatagaya 2-chome, Shibuya-ku, Tokyo, Japan
Instruction Manual (November 1977)
Send comments or questions to Alan Wood
![]()
Created 18th May 2001 — Updated 18th August 2016
Copyright © 2001–2016 Alan Wood