November 2021
Back in January, I managed to take apart an Olympus 35 SWHK 10× L finder eyepiece with jammed dioptric adjustment:
Dismantled Olympus 35 SWHK 10× L finder eyepiece
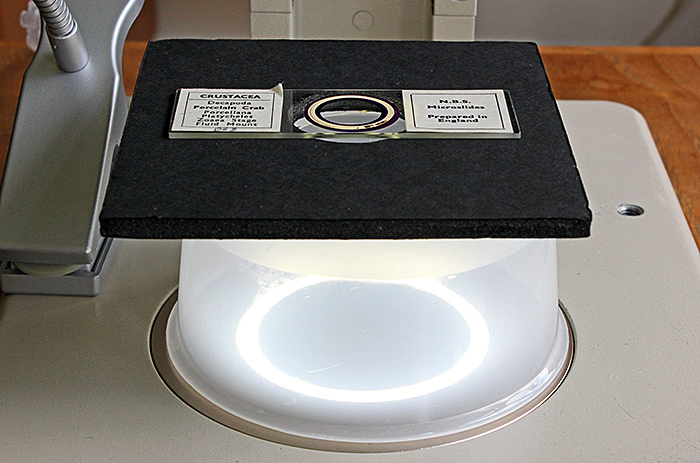
Then in April I cleaned off the old, hardened lubricant and tried to re-assemble it, but I soon realised that the top section with the dioptric scale rotates freely when the 3 grub screws are removed. I had no idea how to make it read 0 at the correct point. I asked on the Olympus Microscope Users Group and Sid Crandall kindly measured some of his as between 55.5 mm and 56.5 mm long. Now seven months later I had some time so I re-lubricated the focusing helix and managed to put everything back together. I needed my SZ4045 stereomicroscope with LED ring-light to get the 3 tiny grub screws for the lower section back in their holes and tighten them. After some trial and error, I managed to get the length to approximately 56 mm and fastened the top section tightly with its 3 small grub screws that are concealed by the rubber ring. The focusing mechanism now works nicely.
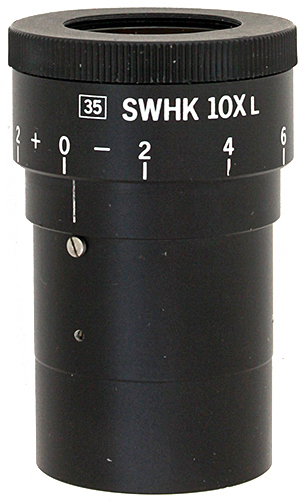
Re-assembled Olympus 35 SWHK 10× L finder eyepiece
October 2021
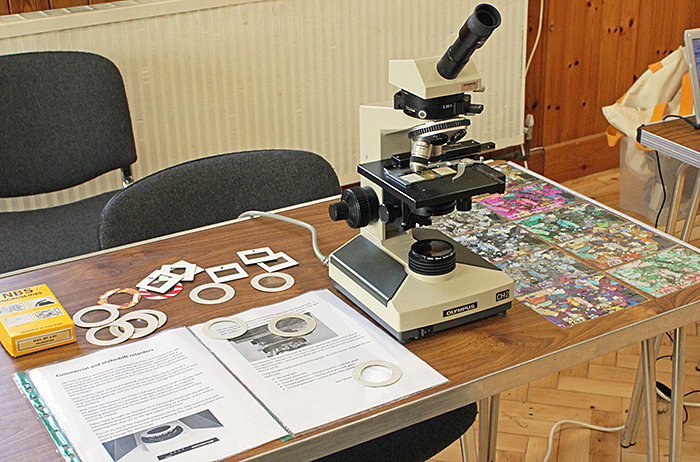
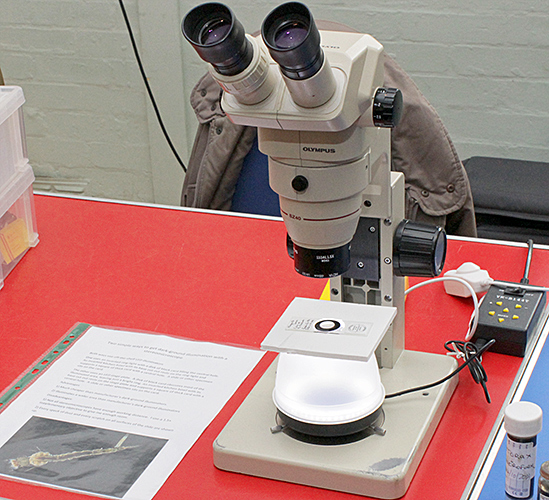
For the Annual Exhibition of Microscopy and the Langton Matravers meeting, I took my Olympus CH-2 microscope with a monocular head (light enough for me to take on public transport) to compare my Olympus AH-TP530-2 full-wave tint plate with an assortment of makeshift retarders.
Alan Wood’s demonstration
At Langton Matravers, Brian Darnton was very generously giving away some of his foram slides from North Cyprus and the HMS Porcupine expedition. I had a look at them using polarised light, and was surprised to see that some of the forams showed a good range of colours.
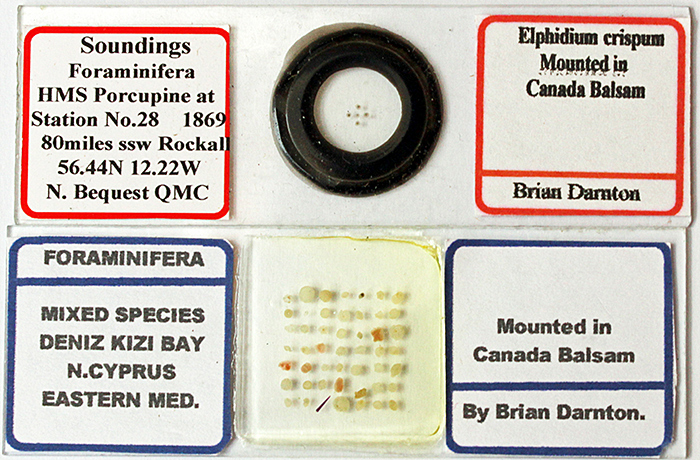
Some of Brian Darnton’s free foram slides
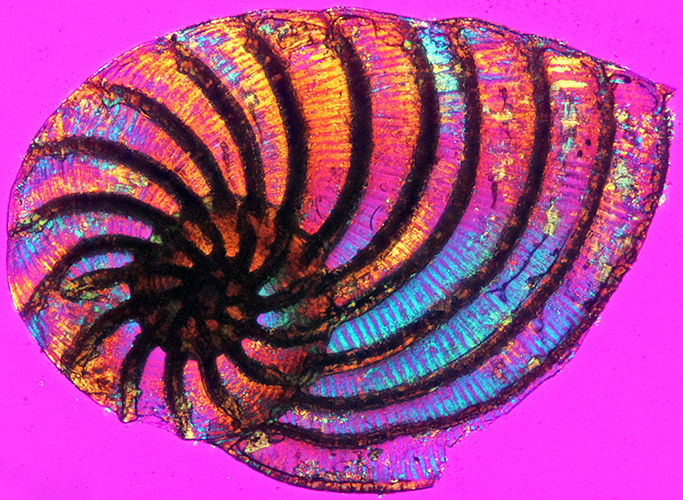
Foram from North Cyprus (length 1.35 mm, crossed polarisers + full-wave retarder)
For the 3-day National Honey Show at Sandown Park, I took my Olympus SZ4045 stereomicroscope to show a set honeybee, illuminated by a 144 LED ring-light that stays cool all day and provides more than enough illumination.

Stereomicroscopes
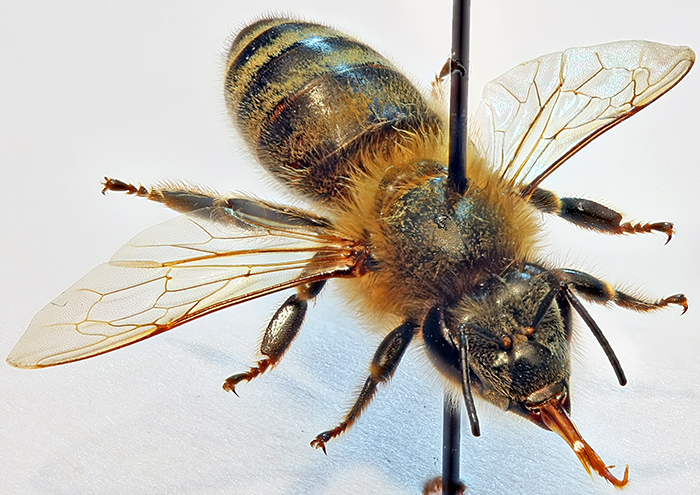
Pinned specimen of a honeybee (Apis mellifera L.)
Canon EOS 40D with 60 mm EF-S macro lens at f/4.5, 25 images combined in Zerene Stacker
In preparation for the Honey Show, I retrieved nearly 100 photomicrographs by Quekett members of honeybee anatomy, parasites and pollen that have been submitted for the Club’s Annual Exhibitions, and combined them in a PowerPoint slide show that I showed on my laptop computer.
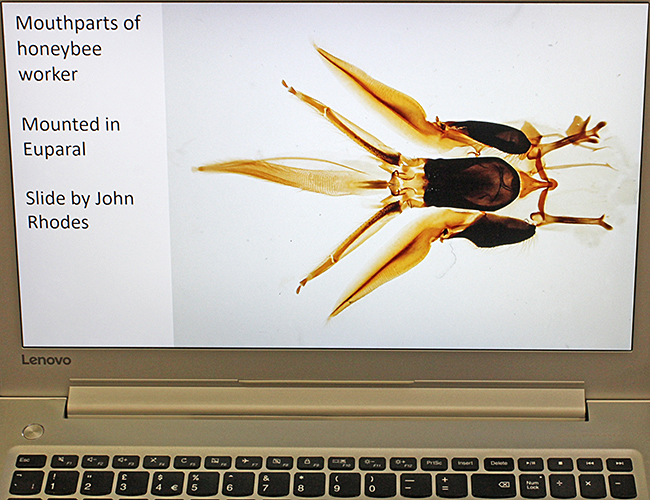
PowerPoint slide show on laptop computer
Slide show: Honeybee anatomy, parasites and pollen
Click the arrows to move through the slides. Click the symbol at bottom right for a larger version.
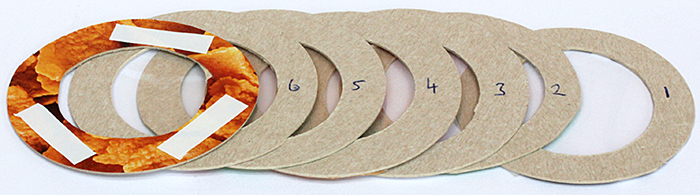
I couldn’t think of anything new for the East of England meeting at Bradfield St George. I hadn’t shown my stereomicroscope dark-ground illumination using an inverted ring-light there before, so I took that. One method uses an inverted LED ring-light, with an inverted kitchen bowl with its base removed providing support for a piece of foam board with a central hole to let the light through.
Stereomicroscope with dark-ground illumination from an inverted LED ring-light

Dark-ground illuminator, showing (left) black disc, (centre) inverted bowl with base removed, and (right) the complete illuminator
A second method uses an LED stage plate with a disc of black paper obscuring most of it, leaving just a bright ring. The specimen rests on a piece of foam board with a central hole, supported on an inverted kitchen bowl with its base removed.
Stereomicroscope with dark-ground illumination from an LED stage plate
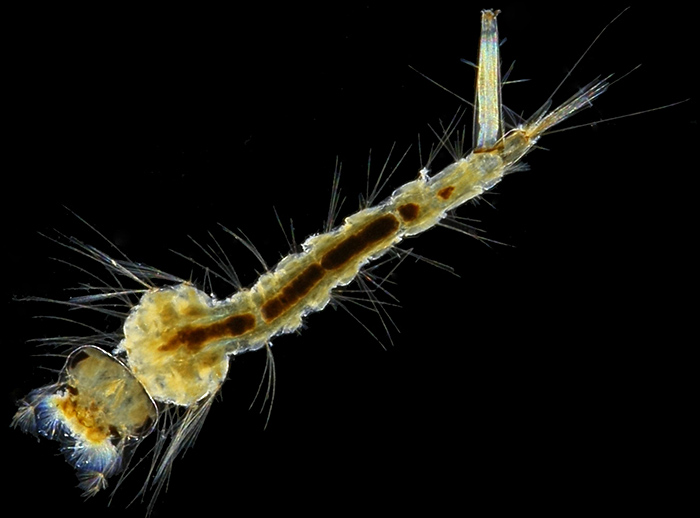
Larva of a mosquito (Culex pipiens); slide by T. Gerrard & Co.
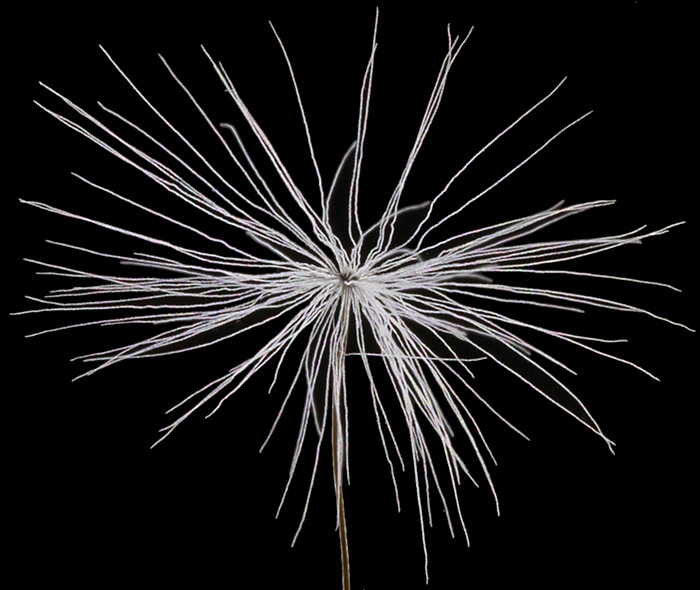
Pappus of seed (achene) of dandelion (Taraxacum officinale)
September 2021
Another face-to-face meeting this month, at Penkridge. The Postal Microscopical Society has been reducing the size of its library, and Mike Samworth had some books and brochures at bargain prices. He kindly gave me some Olympus brochures to scan and add to my website.
At the Zoom gossip, I showed the Olympus full-wave and quarter-wave tint plates (retarders) that fit my BH2-KP intermediate polarising attachment (and also fit the more elaborate BH2-PA version), and compared them with some of my makeshift retarders cut from a variety of plastic films.

Olympus full-wave and quarter-wave tint plates
Makeshift retarders
It is easy to rotate the makeshift retarders (assorted plastic films attached to card annuli) because they just sit on the light output in the base of my Olympus BHT microscope. The tint plates cannot be rotated, which limits their use for pictorial effects, but the specimens can be rotated because the standard BH2-SVR stage rotates through 270°.
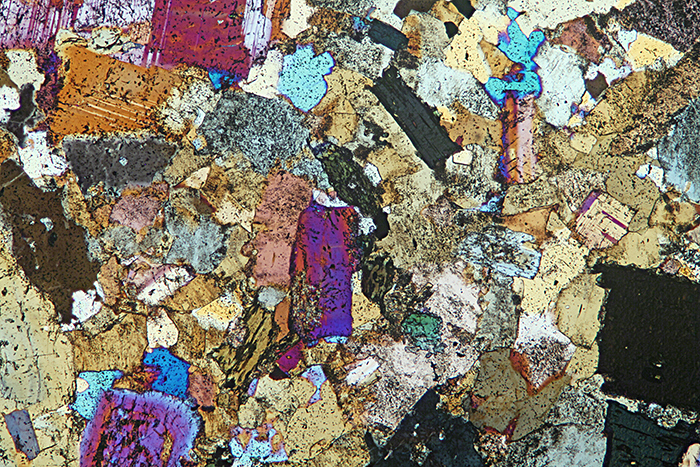
The slide that I used was a thin section of quartz diorite by an unknown mounter, and I showed photomicrographs taken through crossed polarisers plus retarders as well as live images through my Olympus BHT microscope and Canon EOS 5D Mark II digital camera.
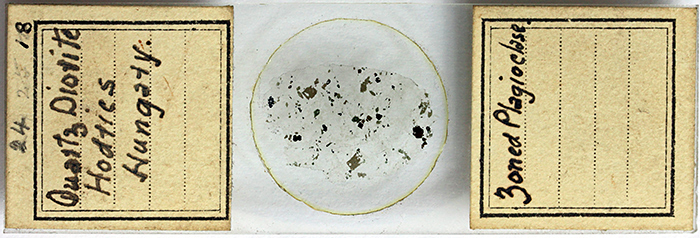
Thin section of quartz diorite
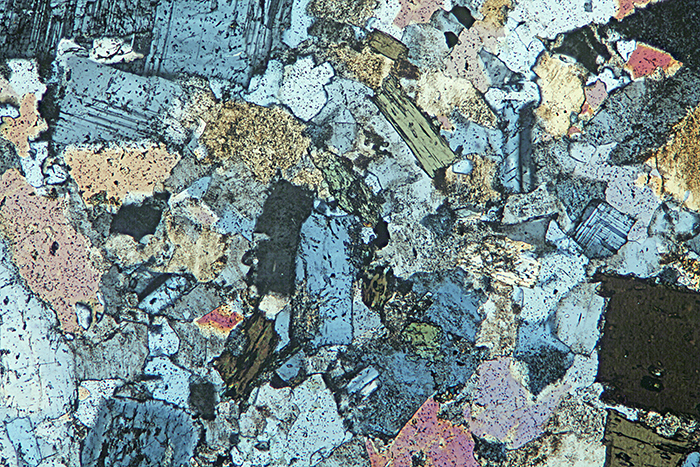
Quartz diorite, crossed polarisers plus quarter-wave retarder

Quartz diorite, crossed polarisers plus full-wave retarder
 Quartz diorite, crossed polarisers plus makeshift retarder
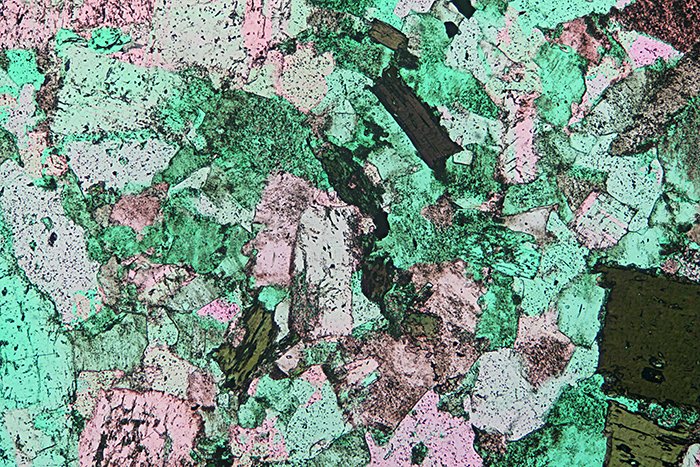
Quartz diorite, crossed polarisers plus makeshift retarder
Some of the makeshift retarders gave interesting results, but none of them were as spectacular as the full-wave retarder. The Quekett Shop sells 2-inch squares of full-wave retarder that should provide very similar results to the expensive Olympus version.
I also showed a conoscopic image of a sheet of mica, the first one I have managed to obtain. I do not have a Bertrand lens, but the instructions for the BHSP polarising microscope explain how to observe a conoscopic image using a pinhole eyepiece or a phase telescope, a 20× or higher objective and the iris in the substage condenser wide open.
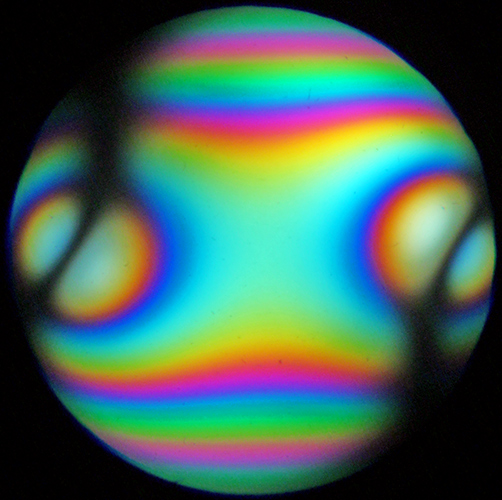
Conoscopic image of mica
Using a phase telescope makes it impossible to use an NFK photo eyepiece, so I used my EOS 5D Mark II with its 50 mm standard lens at f/2.8 attached to a copying stand so that it looked straight down into the phase telescope.
Next month is the Annual Exhibition of Microscopy, so I was busy preparing image galleries for the Barnard Award entries. I also prepared my own submissions:
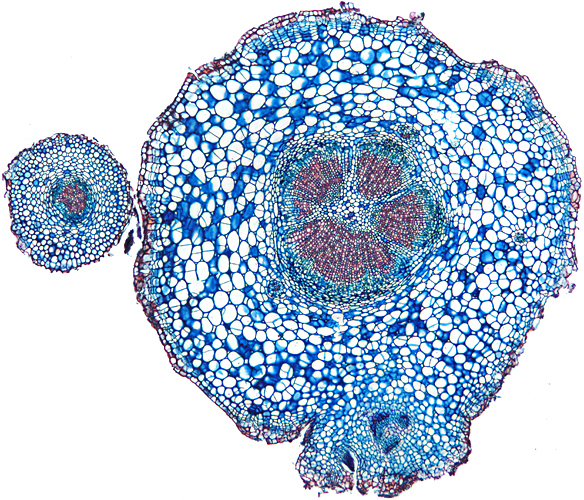
Transverse section of root of daisy (Bellis perennis L.) (4× objective, slide by John Wells (Biosil))
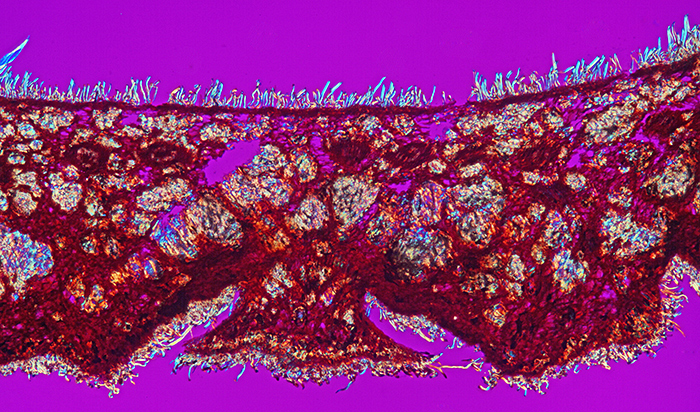
Acorn cup (Quercus ilex) (crossed polarisers + retarder, ×10 objective, slide by John Wells (Biosil))
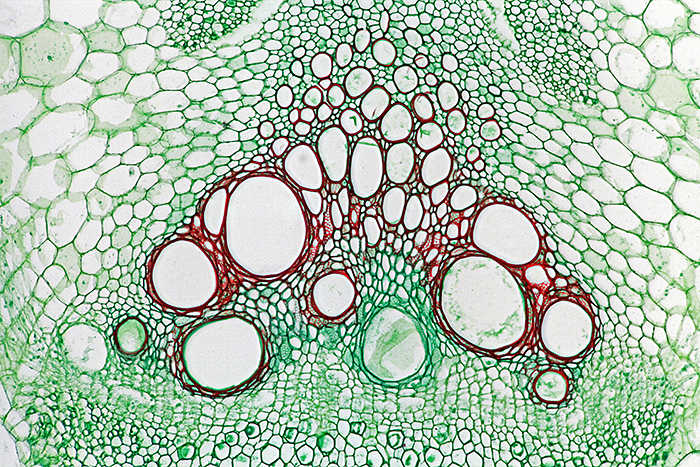
Sieve tubes in stem of Cucurbita sp. (×10 objective, slide by Philip Harris Biological)
August 2021
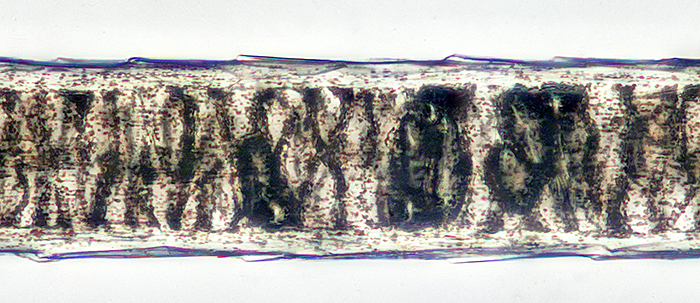
I wanted to see the scales on my remaining fox guard hairs, but I was not able to get a decent image with transmitted light or with reflected light. Now I understand why people make casts of the scales, so I have bought a bottle of clear nail polish at Poundland. It was easy to use the provided brush to paint a smooth layer on a coverslip, but I needed to use my stereomicroscope to see what I was doing when I laid a hair onto the wet nail polish. I let the polish dry for a few minutes and then used my finest forceps to pull off the hair.
I wanted to view through the coverslip to get the best image with a 40× objective, so I rested the coverslip on one of the slides with a square of aluminium that I normally use for pond life.
Cast of scales on guard hair of red fox
(Olympus SPlan 40× objective, NFK 2.5× photo eyepiece, stack of 17 images combined in Zerene Stacker, levels adjusted and converted to greyscale in Photoshop Elements)
I tried to take a second stack of images, but the scales were not as well defined. I suspect that I removed the hair from the nail polish too soon, before it was fully dried.
I had a go at producing labels for the slide of red fox guard hairs that I made last month. I prepared a table in Microsoft Word with 21 × 21 mm cells and ½ point borders and printed it on my laser printer. I cut out the labels with scissors and used PVA adhesive to stick them to the slide; I used the handle of a teaspoon as a spatula to spread the adhesive.
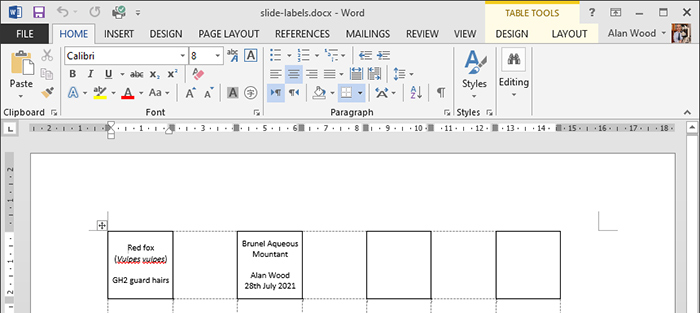
Labels in Word for red fox hairs
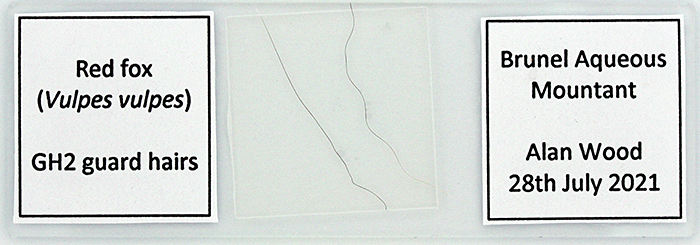
Red fox hair slide with labels
For the “Objectives and NA” gossip on Zoom, I showed 3 of my Olympus objectives from the BH-2 era and explained how their numerical aperture affects their use.

Olympus long-barrel objectives
The SPlan 100 dry objective (1-LB592) must be used dry (without oil) and its NA is 0.95, about the maximum possible for a dry objective. The high NA makes it very sensitive to coverslip thickness, so it has a collar to adjust for thicknesses between 0.14 and 0.20 mm. For best results, the collar needs to be adjusted while viewing the specimen. Its working distance is 0.20 mm.
The SPlan Apo 10 objective (1-LB730) has an unusually high NA of 0.40; most 10 objectives are around 0.25. It is an excellent objective, but the high NA goes with a working distance of just 0.55 mm, making it too dangerous for use without a coverslip.
The SPlan FL 2 objective (1-LB512) has a very low NA of 0.08 and a wide field of view, useful for large specimens or for quickly scanning a slide. The normal Abbe and aplanatic/achromatic condensers cannot illuminate a wide enough field of view, so a flip-top or special low-power condenser is needed. Its working distance is 5.5 mm.
Microscopium was held at a new venue, the Elm Court Youth and Community Centre in Potters Bar, to allow for the social distancing that is part of Covid-19 precautions. A couple of months earlier, the Quekett had been offered a collection of brochures that came from Hampshire Micro. Phil Greaves collected them so that they could be given away at Microscopium. I have most of the Olympus ones so that I can scan them and put the PDFs on my Olympus downloads page.
July 2021
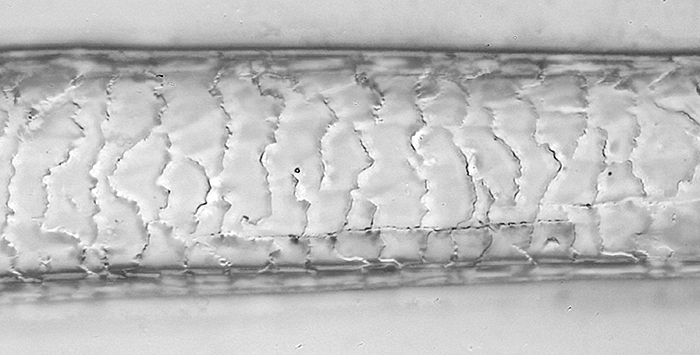
We have occasional problems with foxes, which leave half-eaten pigeons in the garden, dig holes and leave droppings. We have managed to deter most of them by putting bird spikes on top of the fences and the side gate, and removing anything they could use to help jump over the fences or onto the shed. We are still sometimes disturbed at night by animals jumping on the roof above our bedroom, but we did not know if it was a cat or a fox. I have checked the spikes almost every day, looking for hairs, and finally found some. Some of the hairs looked the right colour for a fox, but I could not find anything on Google that looked like them. I wanted to ask for help, but I needed to get a decent photo to share. I haven’t made any permanent slides since school or university, but I have some slides and coverslips for temporary mounts of pond life, and a bottle of Brunel Aqueous Mountant that I bought a few years ago, so I decided to have a go. I didn’t try to clean or clear the hairs, I just put a drop of mountant on a slide, laid a couple of hairs across it, and gently lowered a coverslip.
GH2 guard hair of red fox (Vulpes vulpes) with pigment granules in the cortex (hair diameter 0.04 mm)
I used an Olympus DPlan 40× objective with a 2.5× NFK photo eyepiece on my BHT microscope, and my Canon EOS 5D Mark II camera controlled by EOS Utility. I combined 15 images in Zerene Stacker, and edited in Photoshop Elements.
June 2021
I though it would be interesting to try using my Canon digital SLRs as webcams, and it would give me something to show during the “Building a Zoom practical meeting” gossip meeting next month.
Canon had a beta-version of EOS Webcam Utility some months ago, but it did not support cameras as old as mine. The final release is now available, and it is supposed to work with the 5D Mark III, 6D, 7D, 60D, 600D, 100D, 1100D and later cameras (and also mirrorless EOS R models and EOS M6 Mark II, EOS M50 Mark II, EOS M50, EOS M200). It does not have a user interface, it is just a driver that works when a supported camera is attached and a suitable program such as Zoom is open. Any changes to the camera settings have to be made on the camera. I found that it works with my EOS 5D Mark II (not officially supported) and EOS 600D, but the image is not the full width of the window in Zoom. It did not work with my EOS 40D, and it prevented my EOS 40D from working with EOS Utility; un-installing the driver allowed it to work with EOS Utility again.
- Free download from: Canon EOS Webcam Utility Software
Using Google, I also found digiCamControl Virtual Webcam, which has an interface where you can set aperture, shutter speed, ISO, metering mode, white balance, exposure compensation and focus mode. You can also flip the image left to right, focus, and turn Live View on and off. It is supposed to work with 5D Mark III, 6D, 7D, 50D, 500D, 100D, 1000D and later cameras, and with EOS R models, some EOS M models, and some Nikon and Sony cameras. It works with my EOS 5D Mark II (not officially supported) and EOS 600D, and the image is the full width of the window in Zoom, but movement is not as smooth as with EOS Webcam Utility. It does not work with my EOS 40D. It gave a couple of error messages during installation.
- Free download from: Download | digiCamControl
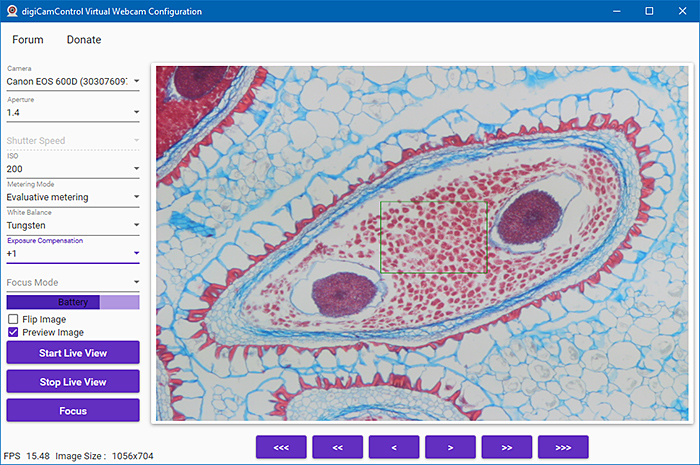
digiCamControl Virtual Webcam (Configuration screen)
Zoom lets you switch between the attached cameras; just click the up arrow next to the Stop Video icon near the bottom left of the window, and select one from the list:
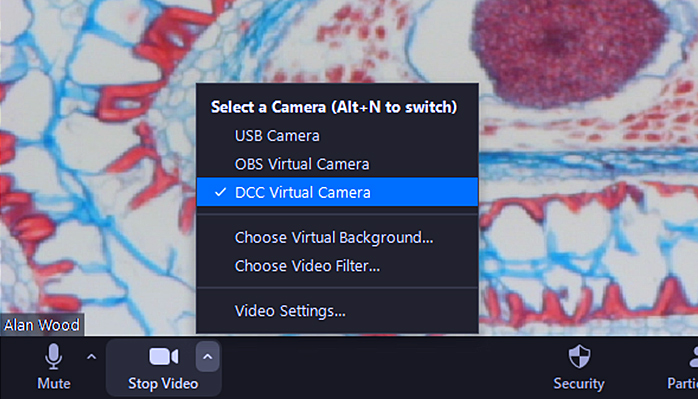
Selecting a camera in Zoom
April 2021
Not much time for microscopy recently, but I made time to prepare for a live demonstration of photomicrography for the first World Microscope Day on 13th April.
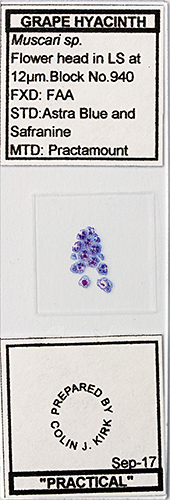
I used a slide made by Colin Kirk of a section of the flower head of grape hyacinth (Muscari sp.), which by coincidence is in flower in our back garden at the moment. Colin stained the section with Astra Blue and safranine, and mounted it in Practamount.
I used my favourite objective, an Olympus SPlan Apo 10×, with a 2.5× NFK photo eyepiece, on my BHT microscope. The camera was my Canon EOS 5D Mark II, controlled by EOS Utility.
I showed how to set up the microscope, including focusing the condenser, adjusting the field iris diaphragm (in the base of the microscope), and adjusting the aperture iris diaphragm (in the condenser). Then in the tethering program, setting white balance, using the histogram to adjust the exposure, and taking a series of photos. Then combining the photos in Zerene Stacker. Then using Photoshop Elements to rotate and crop the image, adjust levels, delete a few blemishes, reduce the size to make it suitable for a web page, and sharpen the image.
I do not enjoy public speaking, and I am not good at it, as you can see in the video below. But if I can do it, anyone can do it, and I hope it will encourage other nervous people to have a go on World Microscope Day next year or in the Quekett Zoom meetings.
Click the arrow to start the video; click the symbol to the left of “vimeo” for a larger version
Click the arrows to move through the slides. Click the symbol at bottom right for a larger version.
January 2021
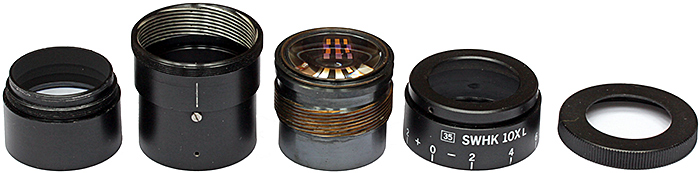
Back in 2012, I was thinking of buying a superwide trinocular head for my BH-2 microscope, and so when I saw a 35 SWHK 10× L finder eyepiece in the Quekett auction I bought it. I didn’t know then that the dioptric adjustment on nearly all of the eyepieces for the superwide head has jammed solid because the grease has hardened; my new acquisition had this problem, and I could not free it. A previous owner seemed to have tried too, because two grub screws were missing. Now I have had another go. I noticed 3 tiny grub screws near the bottom, and when I removed them the bottom part seemed slightly loose. With the aid of two Boa Constrictor strap wrenches, I managed to remove the bottom part, and to my amazement the dioptric adjustment was no longer jammed and I could separate the two main sections.
Dismantled Olympus 35 SWHK 10×L finder eyepiece
Starting from the left, the first and third parts contain lenses, the second part contains the reticle and has 3 grub screws to secure the first part, the fourth part is fastened to the third part by 2 grub screws, and the fifth part pushes onto the fourth part.
I have been wanting to take a photograph of the finder frames, to add to my web page on Attaching a digital SLR camera to an Olympus BH-2 microscope, and with the eyepiece dismantled I was able to do it:
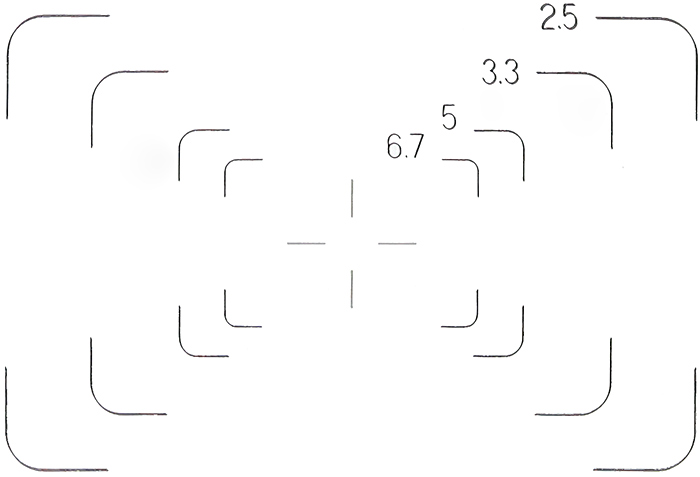
Fields of view for NFK 2.5×, 3.3×, 5× and 6.7× photo eyepieces in 35 SWHK 10×L finder eyepiece
Commenting on this blog
If you would like to comment on anything in this blog, please send me a message.